Today learn 2 ways to make a reusable silicone mold from 3D prints. I will go over how I make simple molds using both plasticware and foam core sheets.
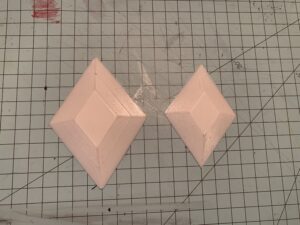
I’m currently working on Qiyana Prestige Skin’s headpiece. This is Part One of a Three part series in which I go over how to make Qiyana’s headpiece and her gems.
What you will learn in this video
- How to customize a print file in Tinker Cad
- How to create a silicone mold using a plastic bowl
- How to create a silicone mold using foam core board
Watch part 2 if you want to see how I pour resin into a silicone mold.
Download Qiyana’s Gem 3D Print File (coming soon)
*If you use my files, please be courteous and credit Haute Cosplay
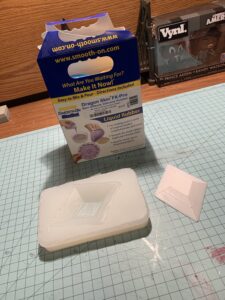
Supplies
- 3D Printer https://amzn.to/307p3Wy
- Dragon Skin Silicone https://amzn.to/2Fb01ME
- Silicone Measuring Cups & Mixing Tools https://amzn.to/2th0076
- Safety mask https://amzn.to/36eeTFN
- Foam Core Sheet or Plastic Food Container
- Latex free gloves https://amzn.to/2R3XKbt
*Note some of these links are affiliate links. They help support my channel by giving me a small commission on when you make a purchase. I greatly appreciate your patronage.
Silicone Molds (plastic food container)
- Wear mask & gloves
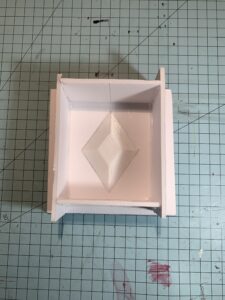
- Place plastic mat with gem in the middle the mat to see where to place the mold walls
- Get a plastic tubber wear bowl and cut off the bottom
- Hot glue it down and seal sides
- Sand 3d piece for any imperfections
- Hot glue 3d piece to the mat
- Add masking tape on the sides for extra protection
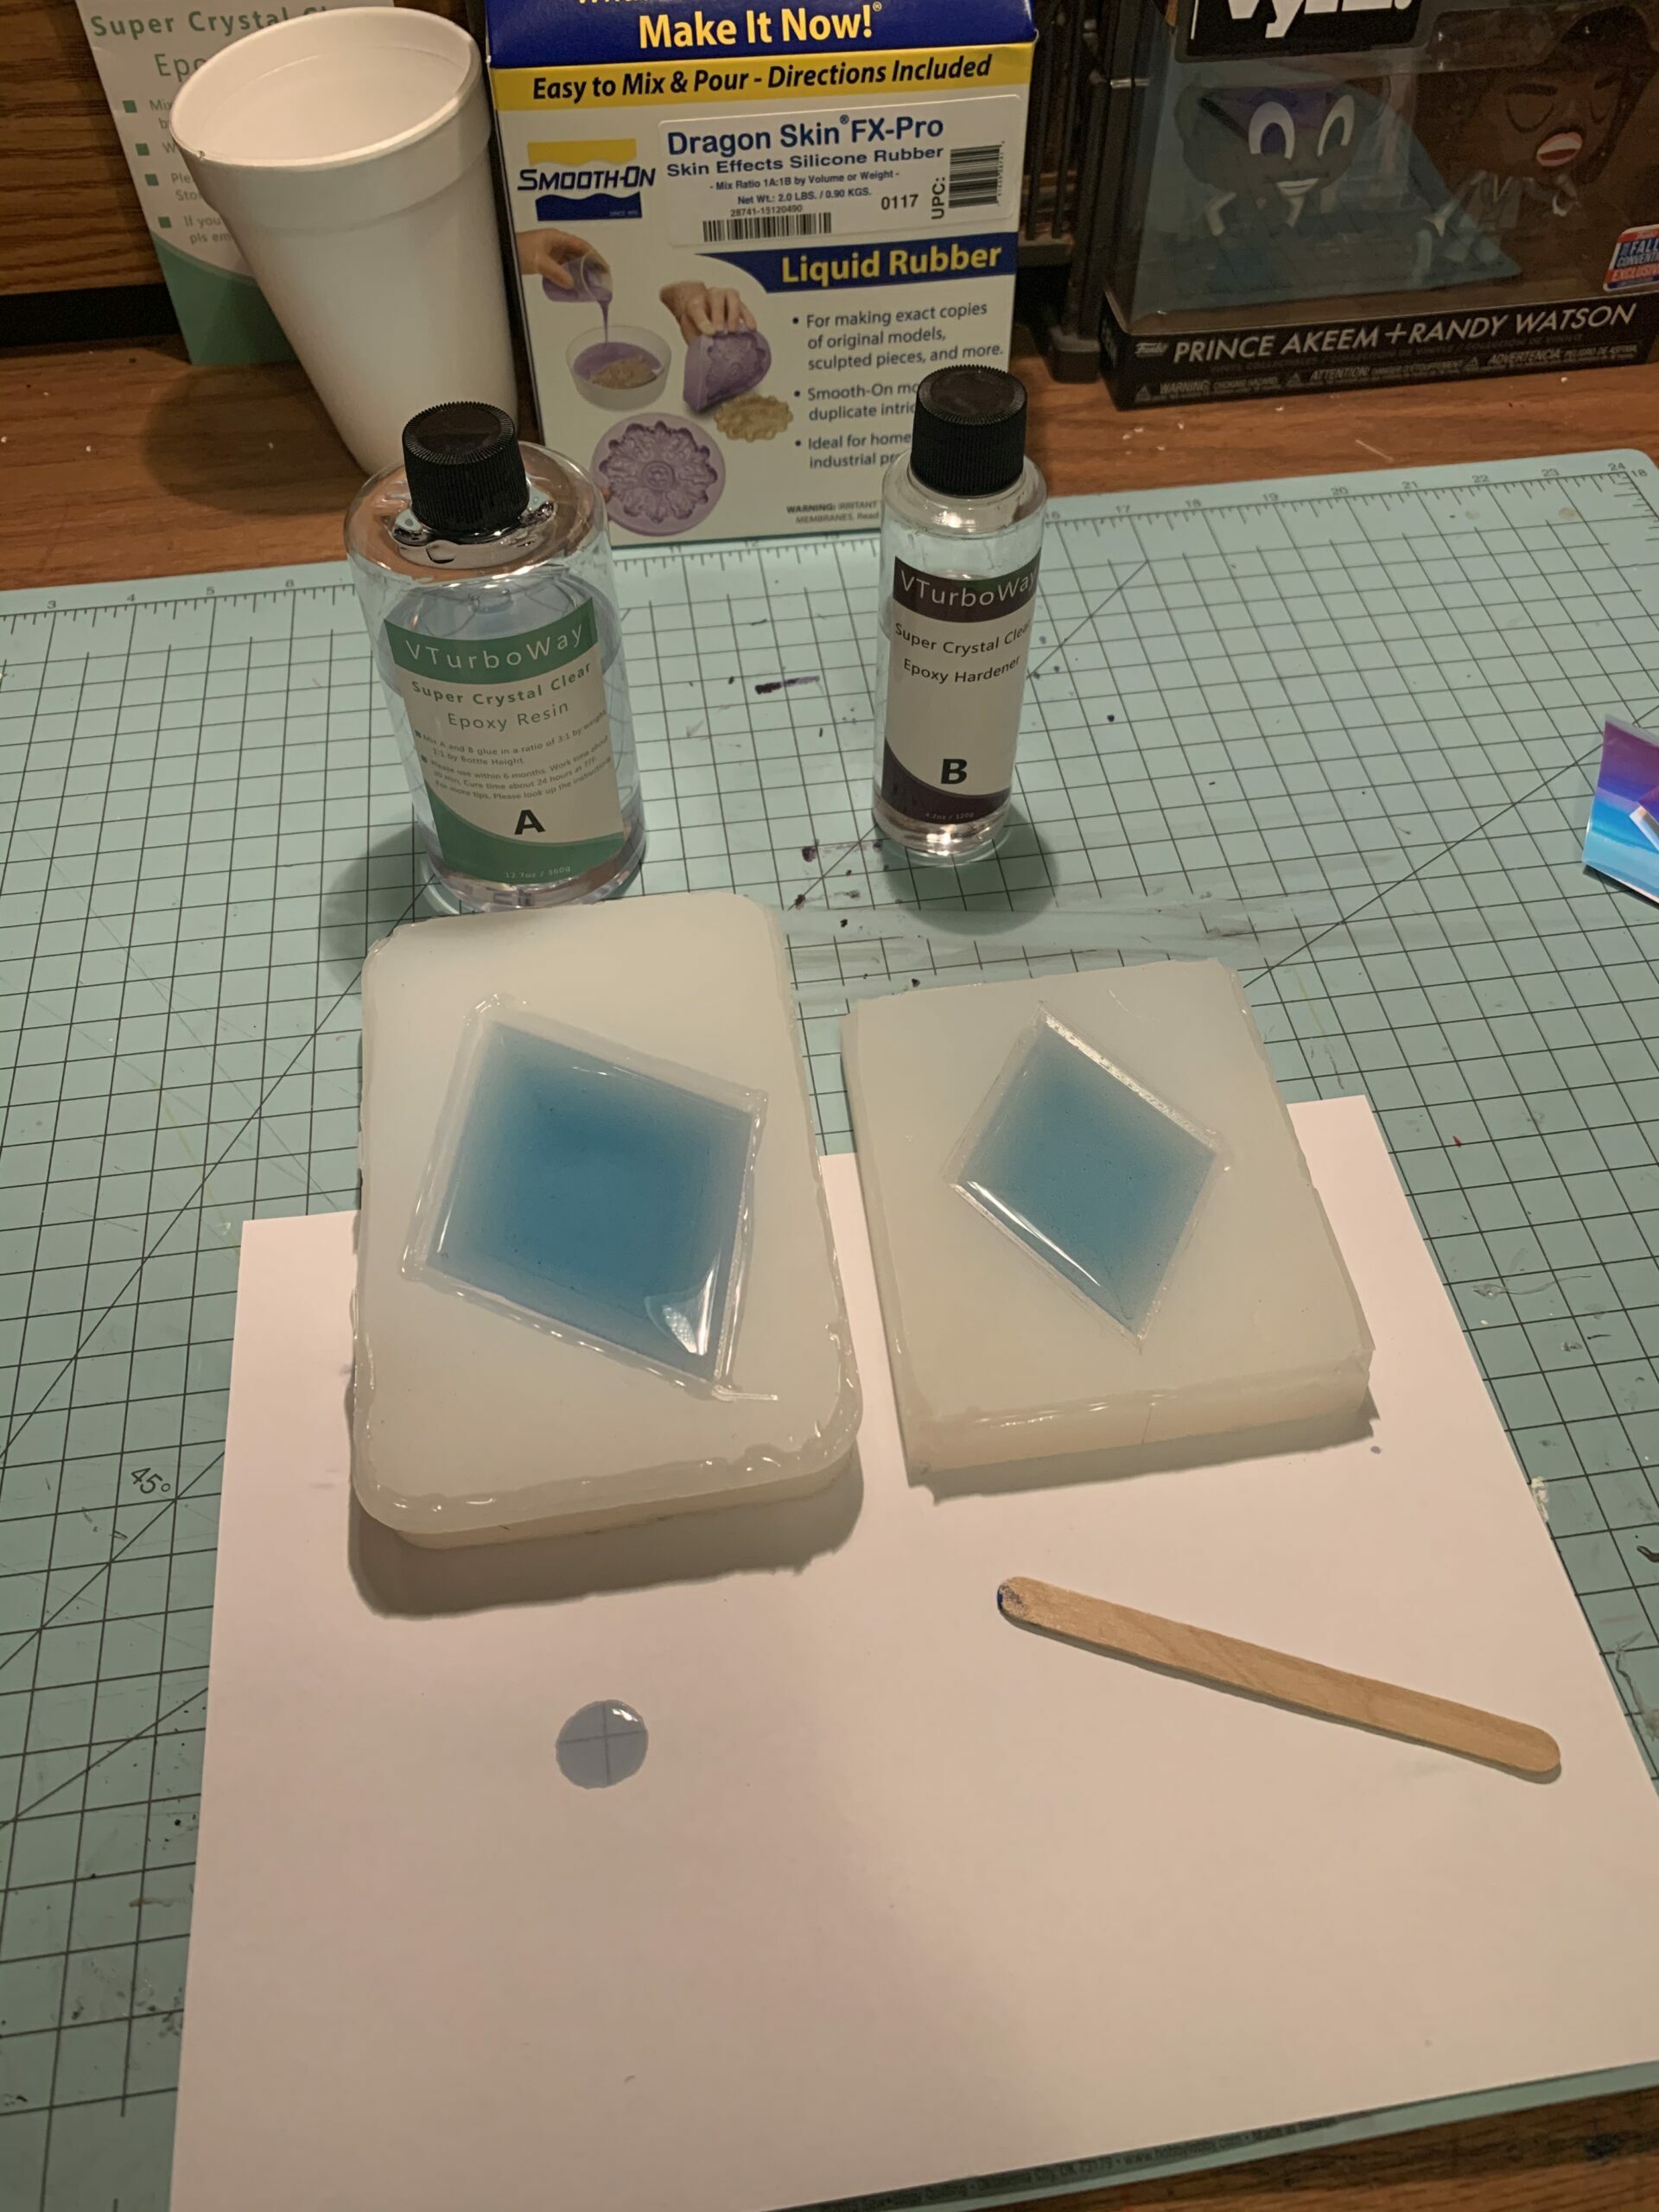
- Explain part A and B
- Measure equals parts A n B
- Mark the cups so you know which is which
- Mix each solution separately before mixing it together very well
- Dragon skin is great because it settles on its own with minimal bubbles
- Pour mixture from above to avoid air bubbles or gaps
- Smack it so that it settles in all the corners
- Pop any bubbles
- Let set for an 16 hours
Silicone Mold (foam core)
- Wear mask & gloves
- Measure and cut out the mold base on foam core (1 inch border around)
- Trace 3d print for placement
- Measure and cut the sides of the molds 2”
- Glue 3d piece on center of mat
- Hot glue side panels
- Reinforce sides with extra hot glue
- Pour equals parts part A and part B
- Label the cups with a sharpie
- Mix very well in one cup
- Pour into mold
- Pound the mold to release any bubbles
- Wait an 16 hours to cure
- Rip open mold and discard foam core
Check out my Social Media
Main Instagram www.instagram.com/haute_cosplay
WIP Instagram www.instagram.com/hautecostume
Facebook www.facebook.com/hautecosplay
Twitter www.twitter.com/haute_cosplay
Blog www.hautecosplay.com